

The smart-telescope revolution rolls on with the latest entry in this growing market, ZWO’s Seestar S30. Unless you’ve been on a desert island and don’t know what a smart telescope is, they’re small robotic instruments that point at and take images of sky objects with little or no human intervention. These devices make obtaining astrophotos of surprising quality easy for just about anyone.
The Seestar S30 is a sleek, modern-looking device with a shiny, white plastic body and black trim that looks more like a security camera than it does an astronomical telescope. That’s what it is though, a 30-mm aperture apochromatic refracting telescope. Its three-element objective lens has a focal length of 150 mm, resulting in a focal ratio of f/5. In addition, the S30 sports a second objective separate from the main telescope, a wide-angle lens with a 23.2° field of view.
The optics are only part of the story, however. The heart of the S30 is an integrated one-shot color camera built around a Sony IMX662 CMOS sensor with an array of 1,920 × 1,080 pixels (2.1 megapixels). Together the system produces a 1.2° × 2.4° field of view. In addition, the scope is equipped with dual-axis drive motors, internal computer, on-board Wi-Fi, a rechargeable battery, an internal dew heater, and a dual-band light-pollution filter that can be switched in and out automatically or through the control app. The S30 is an amazingly small and compact package weighing a mere 1.65 kilograms (3.64 pounds) and measuring just 21 × 14 × 8 centimeters (8.3 × 5.5 × 3.1 inches) excluding its tabletop tripod.
In the Box
In addition to the S30 itself, opening the box reveals a custom-fitted carry case, a solar filter, and a USB charging cable as well as the tiny tripod and a short instruction brochure. What you won’t find in the box is a hand controller. The S30, like most other smartscopes, is controlled wirelessly with an Apple or Android device such as a smartphone or tablet using the Seestar app (available on the Apple App Store or the Android Play Store). You connect your device to the scope via the S30’s onboard Wi-Fi. Images are displayed and saved on your phone or tablet. There is no printed manual, but the app includes setup and operation tutorials.
The Seestar app is primarily designed for use on smartphones and tablets, though if you are the owner of a recent Apple Macintosh with an M2 processor or better, the iPhone app works just as well on your computer. While the display is vertically oriented like on a tablet, it doesn’t take up the entire Mac screen.
Getting Connected
I’ve had problems pairing my smart devices to some Wi-Fi-enabled telescopes in the past, but I had no trouble connecting to the S30, which operates on both 4G and 5G networks. To turn on the telescope, press and hold the power button until it beeps twice, then wait until the S30 says “Power on, ready to connect!” Next, start the Seestar app and follow the prompts. The only quirk is you’ll be asked to allow the S30 to connect via Bluetooth during initial setup (the only time Bluetooth is used). Your device will then be paired directly to the telescope.
Direct connection is helpful in the field away from Wi-Fi networks, but at home it’s better to pair with the telescope through your local network. That allows the phone to remain connected to the internet while using the scope. To do this, select Station Mode in setup and enter the Wi-Fi password. One important benefit of Station Mode is your phone or tablet doesn’t have to remain near the telescope while imaging. All that’s necessary is for the S30 to be within range of the network router some 15 meters or so (50 feet).
I was anxious to get the S30 into my backyard and see what it could do. One thing was obvious: The tabletop tripod wouldn’t work for my needs. I didn’t have a table or other flat, level surface on which to place it. Luckily, the S30 connects to any photo tripod via a standard 3/8 × 16 threaded socket on its base, and I was able to use a telescope tripod I own. Before heading out to the backyard, I made sure the battery was fully charged, which took several hours. The telescope runs about 6 hours on a charge with normal use, and 3½ hours when the dew heater is enabled.
It’s important to level the S30’s tripod to ensure adequate star tracking with this alt-azimuth telescope. The app features a clever Adjust Level function. Touch the picture of the telescope at the top of the screen, then tap Advanced Feature followed by Calibrate, then tap the Adjust button. A window with two circles opens, and the S30 says “Please level your Seestar.” To do so, simply adjust the tripod legs until the circles overlap and the displayed number is as low as possible (I usually tried for 0.2). Once you’re satisfied with your efforts, close the window and return to the main screen.
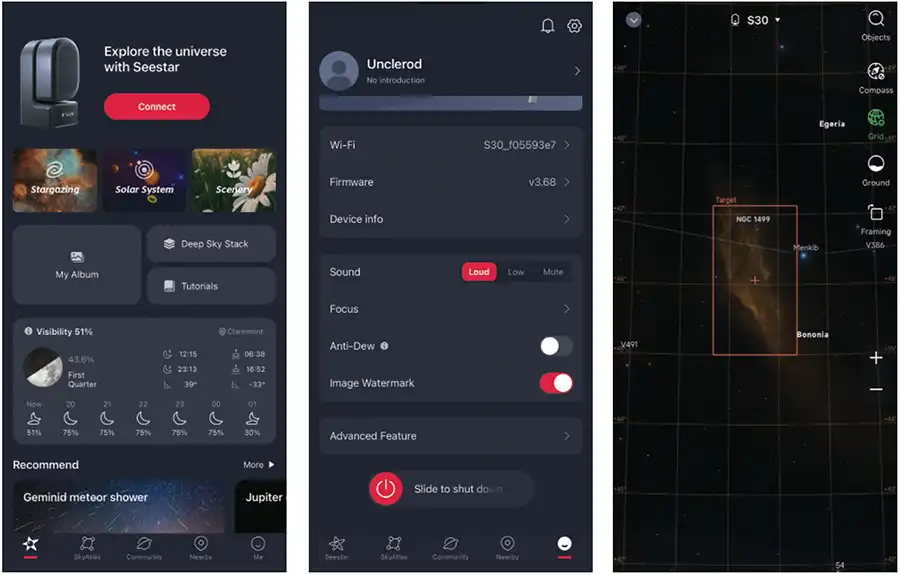
Center: Opening the Me icon at bottom right of the screen brings up information about the S30. Here you can adjust a few settings including focus, activating the Anti-Dew heater, and watermark images with the name of the object and total exposure time. The shortcut for the Advanced Feature menu is also found here.
Right: The Seestar app includes a planetarium feature called SkyAtlas (the second icon from left at the bottom of the main screen). In it, you can scroll around the sky to select and frame your targets. Zooming is performed by moving two fingers apart at your area of interest.
Basic Operation
To begin using the S30, select a target from the app’s main screen. The first categories are Stargazing, Solar System, and Scenery. The last option allows you to shoot photos and videos of terrestrial objects as close as 6 meters (20 feet) away. It was fun to plop the scope down and scan around the neighborhood, using the scope as a 150-mm zoom lens to look at the bird feeder or objects farther afield.
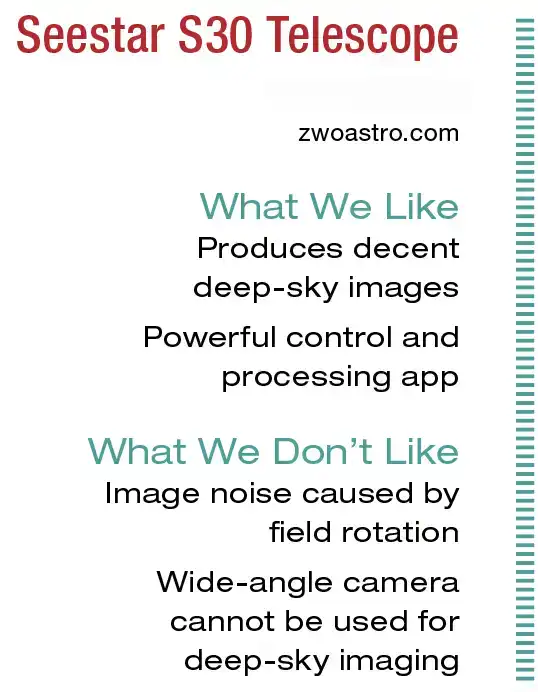
As noted earlier, the S30 also includes a separate, wide-angle objective paired to a smaller detector (ZWO doesn’t give any additional details about the lens or its sensor). I was hoping to see how it performed on the night sky, but unfortunately it’s only operational in either Scenery and Solar System mode. It produces interesting low-resolution views of the Moon, and landscapes that were inferior to photos taken with most any smartphone. If at some point the wide-angle objective becomes available for deep-sky imaging in a future update, I could see using it for images of the Milky Way and other large vistas. For now, it’s pretty much a novelty.

Right: After acquiring your target, the Seestar app offers several options along the right of the screen before you begin accumulating more exposures. Here you can activate the light-pollution (LP) filter, adjust the brightness of the image, or apply the Intelligent Denoising process to the image. The app can also identify objects in the field.
In Solar System mode, the main optics and camera of the S30 take pleasing images of the Moon, Sun (when fitted with the included filter), and bright comets. In this mode, it can record still images as well as videos you can later stack to produce even sharper results. It also offers 2× and 4× digital zoom. While the zoom feature works, it doesn’t provide enough additional magnification to help much with planets. Saturn’s rings are detectable, and Jupiter’s moons are visible, but if the planets are your major interest, this is not the scope for you.
The Little Scope That Could
Where the S30 really shines is with its deep-sky imaging capabilities. You can choose your targets from Tonight’s Best, Deep Sky, or Solar System categories. You can also locate objects with the search bar at the top of the screen. I couldn’t find a specification for the number of objects in its database, but the SkyAtlas (found on the bottom of the main screen) includes the Messier and NGC/IC catalogs. You can also slew directly to any position in the sky by using right ascension and declination coordinates.
Once you’ve made your selection, tap Locate Target Position. This centers the object on the SkyAtlas. Tapping the GoTo button slews the S30 to the object and use plate solving (taking short exposures of the field and comparing the star patterns to those stored in the S30’s internal memory) to precisely match the framing seen in the SkyAtlas. After the object is centered, the app presents a live video display of the field. This is where you can focus and touch-up centering if necessary.
Focus is performed via the Autofocus icon. In about a minute, the S30 was focused and delivering sharp stars.
On one of my first nights with the S30, I decided to try an “impossible” (at least from my yard) target: a 2½° stretch of faint emission nebulosity in Perseus known as the California Nebula, NGC 1499. I’ve never been able to produce a good photo of it from my bright Bortle 6 sky and didn’t expect to with this tiny, inexpensive telescope. When the S30 stopped slewing, though, to my surprise I could see a trace of something on the live view.
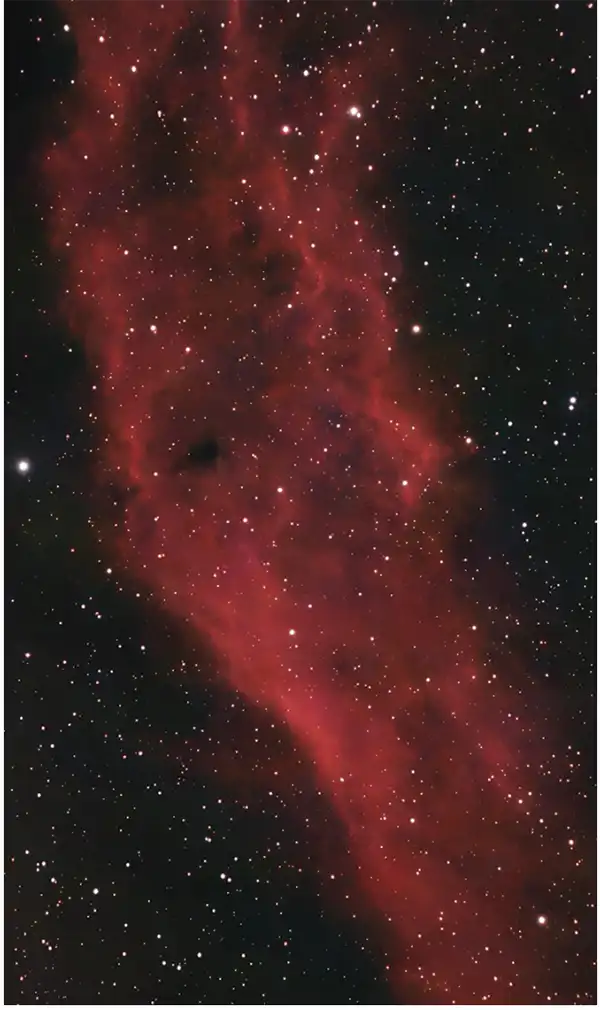
The S30 had automatically engaged its light pollution filter (it detects when the filter can improve an object), and all I had to do was tap the button at the bottom of the display to start imaging. The scope began recording and stacking 10-second exposures, updating the screen with each additional image. After a couple of minutes, there was a recognizable view of the nebula displayed on my phone. An hour’s exposure (during which I did nothing but sit on the couch and watch TV) rendered a picture of the California Nebula better than I’ve achieved from bright or dark sites. Finished photos are watermarked with the object’s name, date and time of exposure, and telescope operator, but that can be disabled in the main menu.
Shortly after I received the S30, ZWO issued a major update to the app which, among other things, added an Intelligent Denoising function that’s applied while the image is accumulating exposures. Using that for my picture improved it even further. I also found that the Denoising feature sometimes made light pollution gradients and other artifacts in my pictures more apparent, but in general the feature works well.
The story was the same with other challenging deep-sky objects. Nebulae so dim I’ve never had any success imaging them from home, like IC 405, the Flaming Star Nebula in Auriga, or B33, the Horsehead Nebula in Orion were easy to capture with this pintsized powerhouse. Given the telescope’s short focal length, large nebulae, galaxies, open clusters, and the rare bright comet are its prime targets. It does a passable job on smaller galaxies and globular clusters, but they aren’t large enough to reveal much detail other than looking distinctly nonstellar.
Expanding the Field with Mosaics
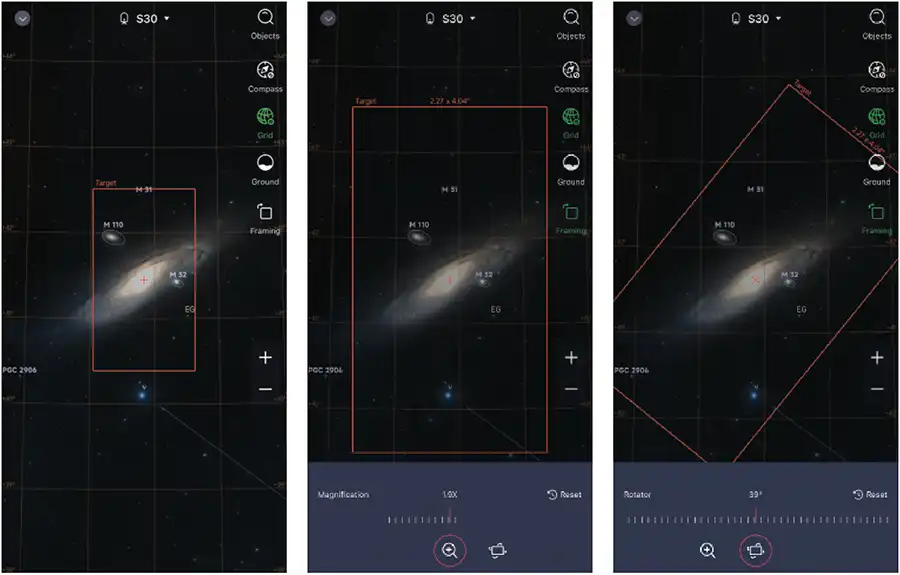
The Seestar’s 1.2° × 2.4° field of view is adequate for most large objects, but what about really big ones like M31, the Andromeda Galaxy? The S30 fit it into the frame when the galaxy is properly orientated with respect to the scope’s rectangular field. It would be nice to place some dark sky around it, though. Shortly after I began testing, there was an update to the app which added a feature called Framing to the SkyMap.
Framing lets you expand and rotate the field-of-view indicator in the SkyMap to accommodate larger fields than a single pointing can achieve. After you adjust the frame size and rotation to your liking, the S30 reports the time required for the exposure. In the case of my new framing for M31 the app indicated the S30 would take 2½ hours to move to and expose the sky at various positions on and around M31.
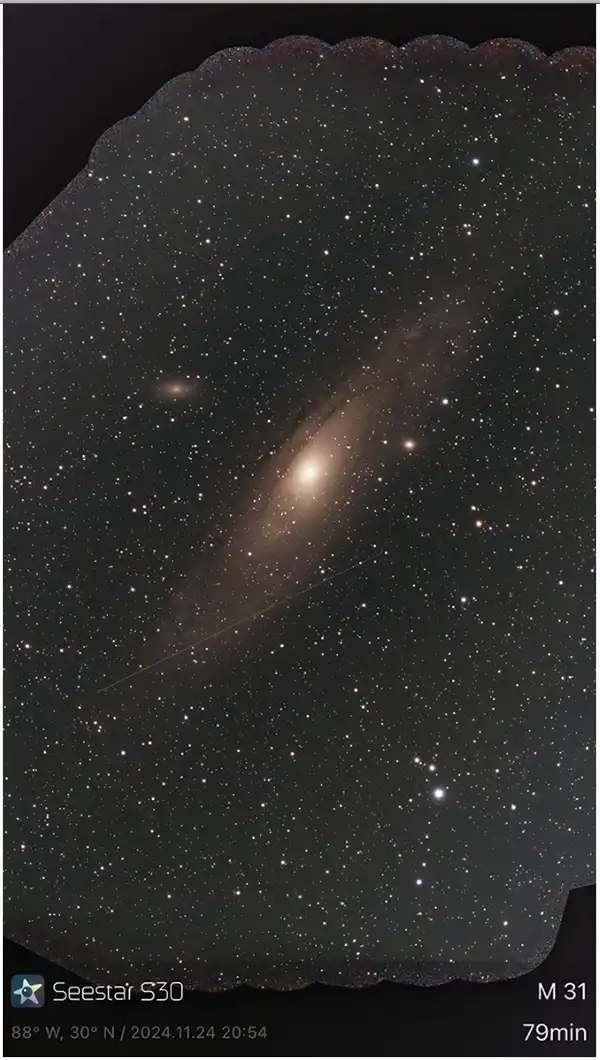
The Framing mode worked, but filling in all the area would have required twice the estimated time, about 4 hours. With the galaxy heading into trees, I stopped after 2 hours. This mode is best if you’re under an open sky and can devote an entire night to one or two targets. However, even though I cut the exposure short, the S30 still delivered a larger field than I’d have gotten without Framing.
I was more than satisfied with the JPEG pictures the S30 sent to my iPhone. More advanced imagers will be pleased to learn that you can set the device to save the individual subframe exposures and corresponding dark calibration frames in FITS format to the telescope’s 64-gigabyte internal memory. These can be retrieved by connecting the scope to a computer with a USB cable or by downloading the images over your local network. You can then stack them yourself using your preferred image-processing software. Tweaking images manually takes time and skill, but results are often better than the pictures the S30 processes automatically.
Final Thoughts
No telescope is perfect, including this impressive little device. One minor issue I experienced was image noise resulting from field rotation. Unless you live at the North or South Pole, stars move in arcs across the sky. An equatorially mounted telescope can follow these arcs, but an alt-azimuth one like the S30 cannot. Instead, it must take short exposures and rotate each frame electronically as it stacks them together so stars don’t trail. This works, but in longer exposures it causes noise to appear at the corners of the image, where there is little or no overlap between sub-exposures. The easiest cure for this is cropping combined with the Intelligent Denoise feature. ZWO recently announced that an equatorial mode is in the works.
It isn’t very often that a new piece of gear for amateur astronomers has literally caused my jaw to drop. That happened multiple times for me while using this tiny scope. I still can’t believe I’m out in my backyard night after night (well the S30 is, I’m in my warm den) delivering images of “impossible” objects like the California and Horsehead Nebulae from my light-polluted sky. All I can say is “Viva the smartscope revolution!”
Contributing Editor Rod Mollise enjoys the ease that smartscopes like the S30 bring to his astrophotography.
Editor’s note: ZWO updated its control app to permit polar alignment after this review was published. This article originally appeared in the June 2025 issue of Sky & Telescope.